If you want to get the most value out of every DTF transfer, learning how to maximize gang sheet space is essential. Every empty inch is money left on the table, so smart layout choices can dramatically lower your cost per print. In this guide, we share practical nesting, sizing, and arrangement tips to help you fit more designs on every gang sheet without sacrificing a clean, easy cut.
Why Maximizing Gang Sheet Space Matters
DTF gang sheets are priced by area or length, which means you pay the same whether the sheet is packed full or half empty. When you maximize gang sheet space, you spread that fixed cost across more designs, driving down the price of each individual transfer.
For a busy print shop or POD seller, the savings add up fast. Squeezing even a few extra designs onto every sheet can shave a meaningful percentage off your production costs over a month of orders. Multiply that by hundreds of sheets a year and efficient layout becomes one of the highest-leverage habits in your entire workflow, the kind of small change that quietly protects your profit margin on every single sale.
Nesting Designs to Fill Every Inch
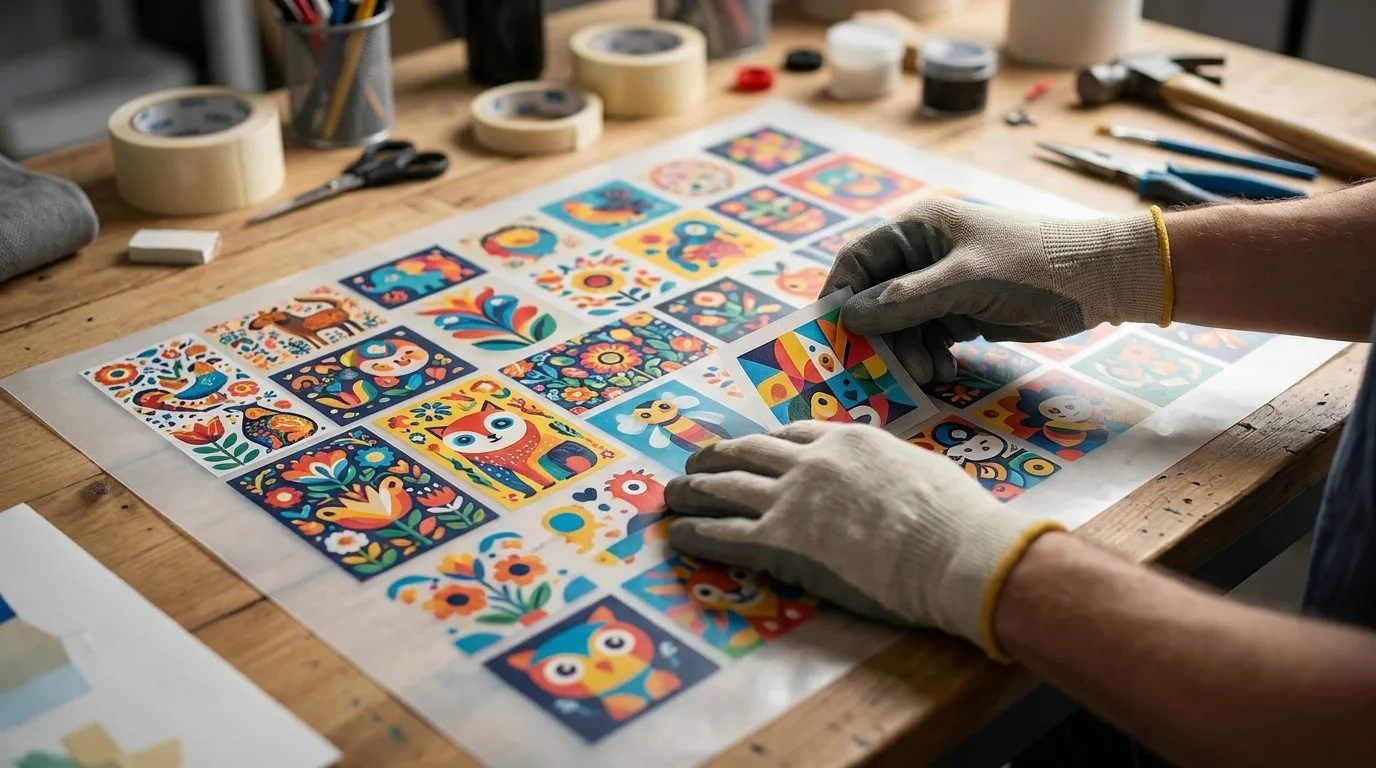
Nesting is the art of fitting irregularly shaped designs together like puzzle pieces. Instead of treating each graphic as a rigid rectangle, look at its actual silhouette and tuck smaller pieces into the gaps around larger ones.
- Rotate tall, narrow designs to lie alongside wide graphics.
- Slide small logos, names, and icons into the corners and edges.
- Interlock curved designs so their negative space overlaps efficiently.
- Group similar shapes together to reduce wasted slivers between them.
Our online gang sheet builder makes nesting easy with drag-and-drop placement, so you can shuffle designs around until the sheet is packed tight. A handy trick is to start with your tallest and widest pieces, anchor them along one edge, and then treat everything that remains as fill, working from large to small until no usable gap is left.
Smart Sizing to Maximize Gang Sheet Space
How you size your artwork has a huge impact on how much fits. A few thoughtful adjustments can open up room for additional designs without crowding the sheet.
Scale to Real Press Dimensions
Always size each design to the exact dimensions you will press, not larger. Oversized artwork eats space and forces you onto a bigger, pricier sheet. Measure your garment placement areas and match your designs precisely. A standard adult full-front print is often around eleven to twelve inches wide, a pocket logo around three to four inches, so keep a cheat sheet of your common sizes nearby to speed up layout.
Fill With Filler Designs
When you have leftover space after placing your main graphics, fill it with high-value extras like pocket logos, care tags, small repeat designs, or seasonal icons you know you will sell. That way no inch goes to waste. Smart sellers keep a small library of evergreen filler designs ready to drop in, turning otherwise wasted scraps of sheet into bonus inventory they can press and sell later.
Spacing Without Wasting Space
Tight spacing helps you fit more, but too little room makes cutting a nightmare. The goal is the smallest safe gap that still lets you separate designs cleanly.
- Use a consistent quarter-inch gap as your baseline.
- Reduce spacing slightly for simple shapes you can cut quickly.
- Keep a little extra room around intricate or fragile designs.
- Align designs in neat rows or columns to speed up cutting.
For a full walkthrough of layout best practices, check out more guides on the Mr Beat Print Studio blog.
Plan Ahead to Maximize Gang Sheet Space
The biggest space savings come from planning before you build. Gather all your designs first, then sort them by size and shape so you can arrange the large pieces first and fill gaps with smaller ones. Batching multiple orders onto a single sheet, when timing allows, is another powerful way to fill space and cut costs. If you hold orders for a day or two to combine them, you may turn three half-empty sheets into two packed ones, and that consolidation goes straight to your bottom line.
Common Mistakes That Waste Space
Even experienced sellers leak money to a few avoidable habits. Watch for these traps when you lay out a sheet.
- Leaving designs as big rectangles. Failing to nest means large empty corners around angled or rounded artwork.
- Over-spacing out of caution. A half-inch gap everywhere feels safe but can cost you an entire row of designs.
- Ignoring rotation. Many designs fit far better turned ninety degrees, yet beginners leave everything upright.
- Stopping too early. If there is room left, add filler. An unfinished sheet is the same price as a full one.
Cost and Quality Considerations
It is worth repeating that packing a sheet tightly never harms quality. Each transfer prints and presses exactly the same whether it sits alone or shoulder to shoulder with twenty neighbors. The only thing you are optimizing is cost. That makes maximizing space a rare win with no downside: you keep identical print results while steadily lowering what every design costs you. Treat the layout stage as part of your pricing strategy, not an afterthought, and your margins will thank you.
Frequently Asked Questions
How do I fit more designs on a gang sheet?
Nest designs by rotating and interlocking them, size each graphic to its exact press dimensions, and fill leftover gaps with small logos or repeat designs. Tight, even spacing also lets you pack in more.
What is the ideal spacing between gang sheet designs?
A quarter inch is a reliable baseline. It gives you enough room to cut cleanly without wasting space, though you can trim it slightly for simple shapes or add a touch more around delicate artwork.
Does maximizing space affect print quality?
No. As long as you keep enough room to cut between designs, packing the sheet tightly does not hurt print quality. Each transfer prints and presses exactly the same regardless of how full the sheet is.
Should I rotate my designs to save space?
Yes, when it helps. Rotating tall, narrow graphics to sit beside wide ones often closes gaps that would otherwise go unused, and most builders let you turn any design with a single click.
What are good filler designs for empty space?
Pocket logos, name tags, care labels, small seasonal icons, and copies of proven best-sellers all make excellent fillers. Keep a ready library so you can drop them into leftover space instantly.
Is it worth combining several customer orders on one sheet?
Often, yes. Batching orders fills a sheet more completely and lowers your cost per transfer, just be sure to keep your designs organized so you can cut and sort each order correctly afterward.
Pack more value into every order by laying out your designs with the Mr Beat Print Studio gang sheet builder and start printing smarter today. Explore all of our transfer options in the full catalog.